

1. Choose a record hotkey
Click the circle near the bottom-right corner of the app to open Macro recorder. Leave Recorder on. Click the Hotkey field, then press a key you want to use for starting and stopping a recording. This example usesF9.
Choose a single key, not a mouse button, modifier, or Caps Lock. While the
recorder is enabled, that key is reserved for recording: it takes priority over
script bindings, does not reach the target app, and is excluded from the take.
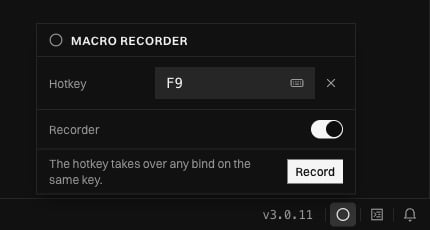
The recorder menu opens above the circle in the status bar. F9 is the record hotkey selected for this example.
2. Record the sequence
- Switch to the app where you want to record and put it in the starting state.
- Press your record hotkey once, then perform the sequence.
- Press the same key again to stop and save.
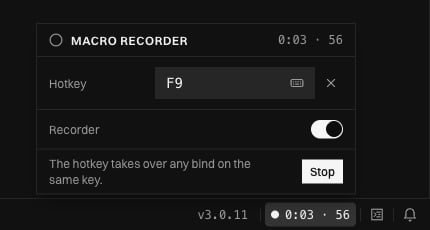
During a take, the menu offers Stop and the status bar shows the timer and action count.
3. Open the saved macro
Click the Macro saved notification to open the file. You can also open Scripts, expand the lowercase macros folder, and select it there. Each take gets a.luau file named macro-YYYYMMDD-HHMMSS in your
scripts folder.
The Code view shows the recorded actions and their delays. You can leave
the code as it is and configure playback in Options.
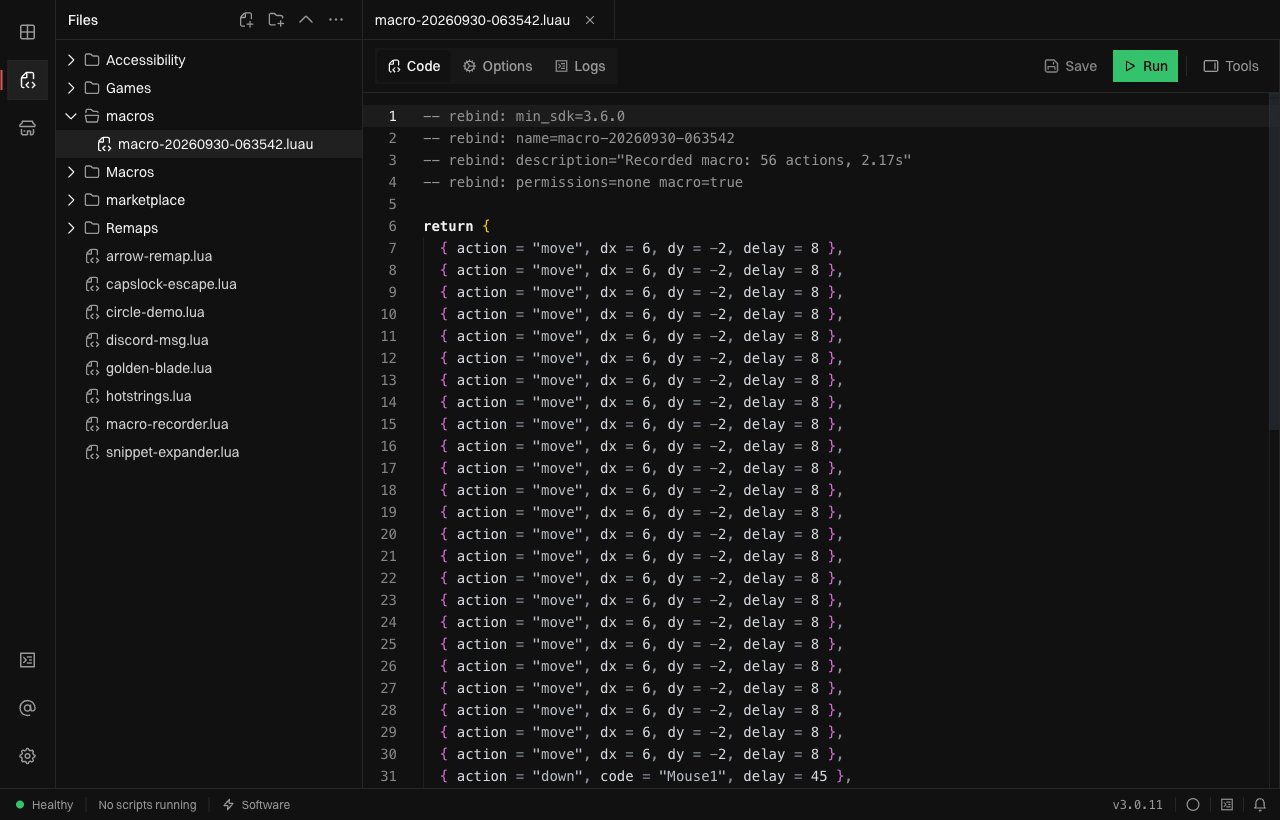
A saved take opens as an editable file in Scripts. Switch from Code to Options to set up playback.
4. Set up playback
With the macro stopped, open Options:- Click Play hotkey, then press a different key from the record hotkey.
This example uses
F6. - Leave Playback speed at
100%for the recorded timing.200%halves the delays;50%doubles them. - Leave Mouse movement scale at
100%for the recorded movement amounts. Increase it for more travel or decrease it for less.
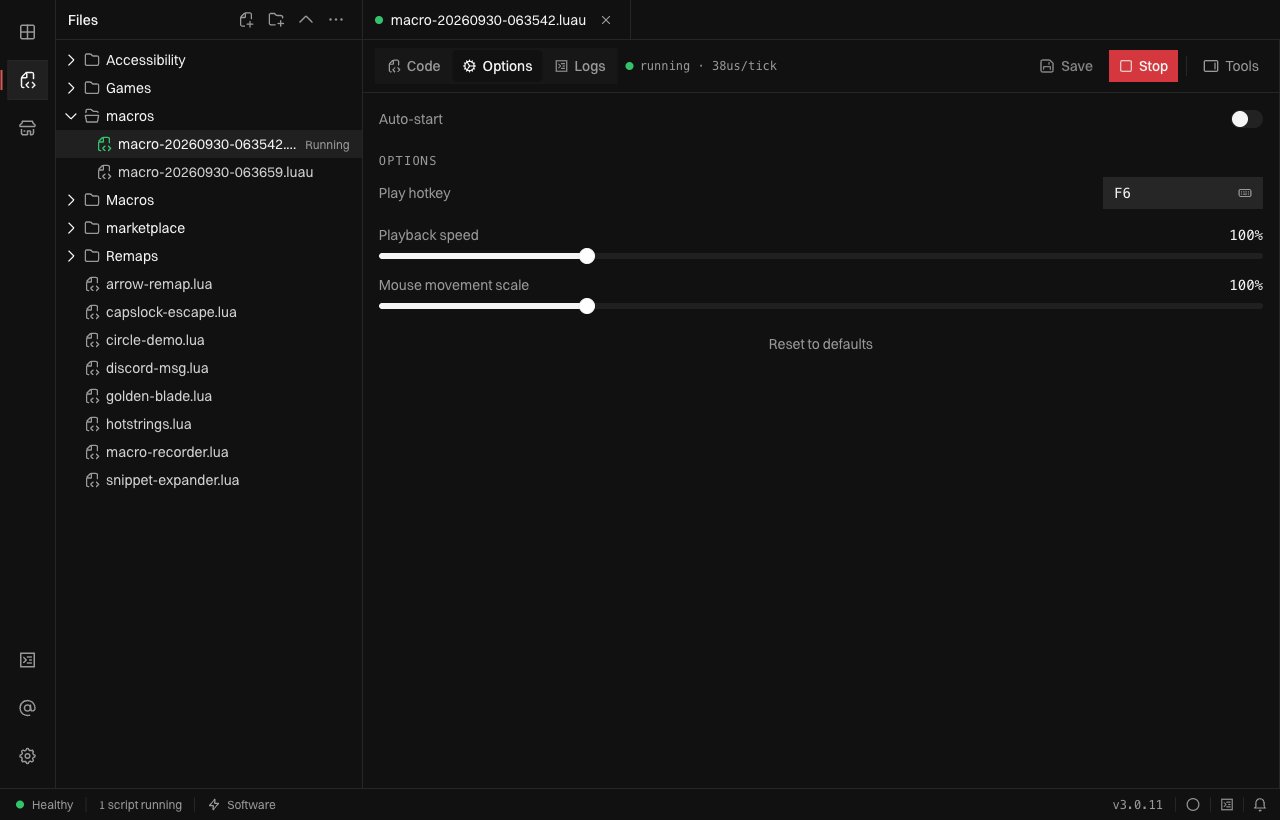
After Run, the macro is armed for F6 and the toolbar offers Stop. Both sliders are at 100%.
Stop or disable
Click the macro’s Stop button in Scripts to stop playback and disarm its play hotkey.Left Ctrl + Left Alt + K stops all scripts and releases held
input.
To free the record hotkey for normal use, click Clear hotkey (the cross
beside it) or turn Recorder off in the recorder menu. Stop and save an
active take first.
For recording from Luau, use the recording recipe.
For reusing a saved take inside another script, see require
and the Macro API.